Related Posts Plugin for WordPress, Blogger...
Showing posts with label dairy. Show all posts

Tangy Homemade Ranch Dressing

As a self-proclaimed vinaigrette type of girl, I usually avoid creamy dressings. It’s not because of some dietary issue, but I think it goes all the way back to childhood. My Dad was an executive chef who owned a German/Austrian/Hungarian restaurant in Jamaica during the 70’s and I always remember him making creamy type salad dressings at home. I know he made other types as well, but the creamy ones are most prevalent in my memory. They always seemed to have a sweetish kind of taste, which is why I never gravitated to them and I still haven’t changed. Since I was a very young child, I have never had the palate for sweet and sour in my food. I have however always liked savory and salty flavors.

In my older years, I am becoming much more tolerant and have tried a few creamy dressings that have made me change my mind, like the Ranch Dressing that I tried Red Wing Restaurant in Groveland, Florida. it is the best Ranch Dressing that I have ever tasted and they make it from scratch. After having a wonderful meal with friends one Sunday, I promised myself that I would try and re-create the dressing.

This one is a cool creamy dressing. Now I have tried so many varieties of Ranch dressing and each has a different flavor using a variety of herbs.

Flavored with fresh herbs, this is a refreshingly cool and creamy dressing with just the right amount of zing from tangy buttermilk, sour cream and vinegar. This dressing is not only used on salads, but goes well as a dipping sauce for raw and fried vegetables.

You will need:
(Printable Recipe)
⅓ cup of mayonnaise
cup of sour cream
¾ cup of buttermilk
½ teaspoon vinegar
splash of Worcestershire sauce
1 tablespoon chopped onions
1 clove garlic
1 tablespoon freshly chopped dill
2 tablespoons parsley
2 tablespoons chives
2 pinches salt (or to taste)
2 turns freshly ground pepper

Place all the ingredients in a blender or a food processor, blend until smooth.

This recipe yields 1½ cups of dressing. Voilà. Enjoy the goodness!

Read more...

Quiche Lorraine

This is such a wonderful way to start off the perfect weekend breakfast. A flaky crust filled with a creamy, cheesy custard filling with bacon bits, a glass of orange juice and fresh fruit on the side with a steaming cup of coffee. What a delicious way to start your morning.
Photography by Robert Demetrius

You will need:
Pâte Brisée or one store bought ready-to-bake rolled pie crust
4 slices thick cut smoked bacon, cut in ¼ inch slices (8 ounces)
⅛ teaspoon nutmeg
¼ teaspoon salt
⅛ teaspoon pepper
1 cup grated Gruyère
2 eggs + 2 yolks
1 cup whole milk
½ cup heavy cream

If using the Pâte Brisée recipe, just use half the ingredients, as you will only need one crust.  Once you have made the dough and it has been in the fridge for an hour, remove and allow to rest at room temperature for about 5 – 10 minutes. This will allow the dough to soften a bit and it will be easier to roll.
Dough Ready to be Rolled
Pre-heat the oven to 400° Fahrenheit. While the oven is warming up, unwrap the dough and place on a lightly floured surface and also dust the top of the dough with flour. 
Rolling Out Dough
Roll out the dough, starting from the center to a 12inch circle. The dough should be around ⅛ inch thick.
Rolled Dough Ready to be Placed in the Dish
Gently Rolling Pastry on Rolling Pin
Lightly butter a 9inch pie dish, then gently roll the pastry on the rolling pin before unrolling over the baking dish. Press the dough gently into the dish as well as around the edges. 
Pressing Dough onto Dish
Cut the excess dough from the edges. Make sure the edge of the dish is well covered with dough, because it may shrink a bit during baking. If you have any tears in the pastry, use some of the excess dough to patch them together.
Flattening Pastry with Fork
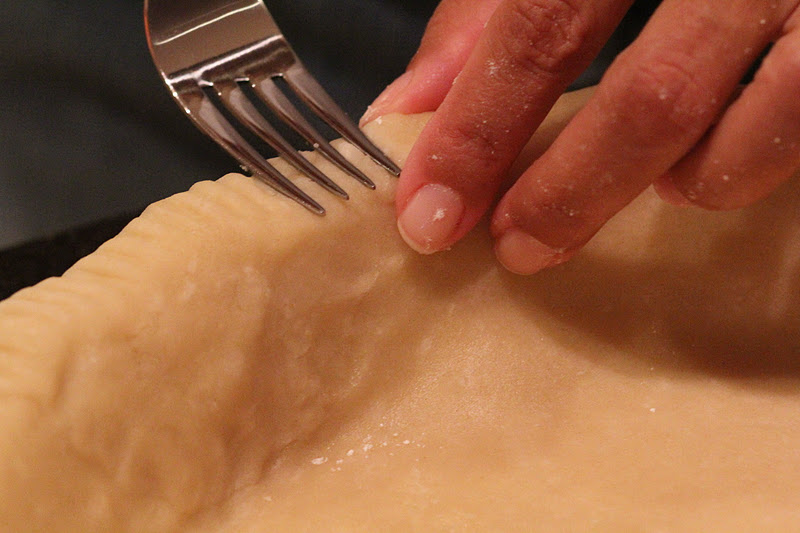
Using a fork, lightly prick a few holes in pastry. This will prevent the crust from rising and bubbling up when baking. This has happened to me in the past, even though I used weights while baking. Then, using the tines of the same fork, flatten the pastry evenly on the rim of the dish.
Pastry Flatten on the Rim
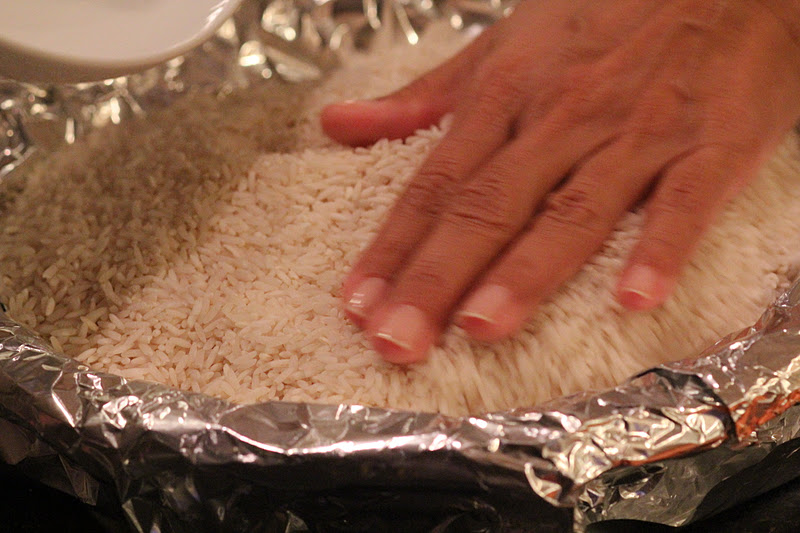
Cover the pastry with aluminum foil and weight with beans, rice or with weights. I usually use rice. 
Covering Pastry with Aluminum Foil, Weighted with Rice
Bake the crust for 18 minutes. Once baked, remove the weights and aluminum foil in one swoop, by just lifting the aluminum foil, by the edges with the weights. Place the dish back in the oven to allow the crust to dry out a bit and get golden brown for another 10 minutes. Remove from the oven and allow to cool on a cooling rack.
Baked Crust
Once the crust has cooled, heat a skillet over medium high heat. 
Bacon cut in 1/4 inch slices
Cut 4 slices thick cut smoked bacon in ¼ inch slices. Toss the bacon slices in the heated skillet and allow the fat to render and the bacon gets crispy. This can take 4 – 5 minutes. When crispy, remove from skillet and place on paper towel lined plate to absorb any excess fat.
Bacon Bits 
Pre-heat the oven to 350° Fahrenheit.
Grated Gruyere
Grate 1 cup Gruyère.

Eggs, Egg Yolk, Salt, Pepper, Nutmeg, Whole Milk and Heavy Cream
In a large bowl, whisk together 2 whole eggs and 2 yolks, ⅛ teaspoon nutmeg, ¼ teaspoon salt, ⅛ teaspoon pepper, 1 cup whole milk and ½ cup heavy cream.
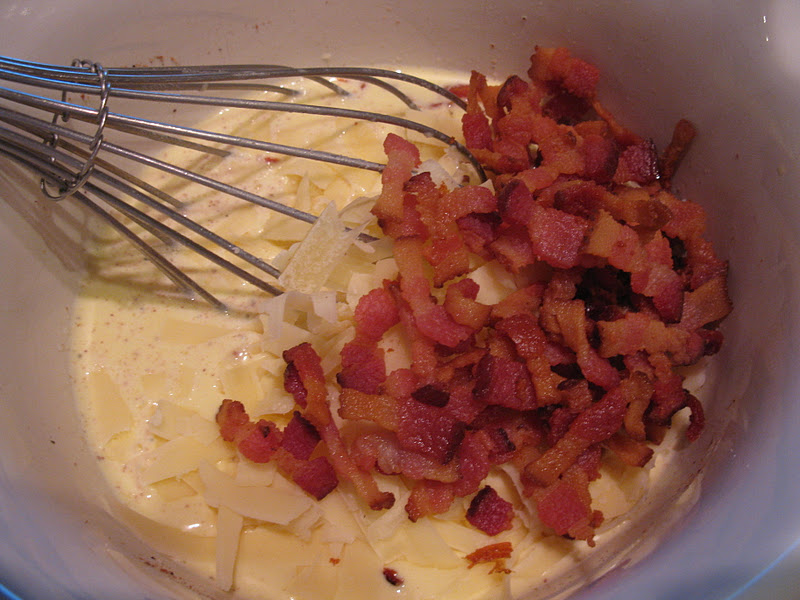
Adding to Egg Mixture, Cheese and Bacon Bits
I then add the cheese and the bacon bits and mix together before pouring into the cooled crust.
Covering Edges with Aluminum Foil
Cover the edges of the crust with aluminum foil. Bake the quiche for about 25 minutes before removing the foil from the edges and bake for 5 more minutes before taking the quiche out of the oven.

To test the quiche, stick a knife or a bamboo stick in the middle and if it comes out dry, then it’s done. If it still jiggles a little bit, don’t worry. It will set by the time it is cooled. Let cool and serve at room temperature.

A Slice of Quiche Lorraine with Baby Greens Tossed with Vinaigrette
This serves 6. Voilà. A slice of quiche with baby greens tossed with vinaigrette and a glass of sauvignon blanc can also be served as light lunch or supper.  Enjoy!

Read more...

Melted Leeks with Cream

Leeks have a delicate onion flavor and smell a bit like scallion. With a hint of nutmeg and a small splash of cream added to the delicate taste, this simple side dish becomes a complex delight that will compliment fish, poultry or beef.
Photography by Heaven on Hearth


 You will need:

4 stalks leeks, yields 5 cups sliced
2 tablespoons olive oil
4 tablespoons butter
½ teaspoon salt
¼ teaspoon ground nutmeg
1 tablespoon heavy cream

Remove the course outer stalk of the leek as well as cutting off the very dark green leaves at the top, as they don’t have a lot of flavor and are quite woody and chewy.

We will be using the white onion base and the light green stalks. Slice leeks in ¼ - ½ in slices. Then they need to be washed a few times as leeks tend to hold a bit of sand in between the layers. Rinse under running water, ensuring all the sand has been removed. I tend to rinse them at least 3 times. To check that they are free of sand, fill a bowl with water; place the sliced leeks in the water. Remove the leeks with a slotted spoon and if the bottom of the bowl is clear of sand, you can drain and dry on paper towels. If not, continue to rinse them until clean.

Heat a deep skillet, over medium high heat, and then add 2 tablespoons olive oil and 2 tablespoons butter. 

Once the butter has melted, toss in the washed, drained and dried leeks, sauté for 3 minutes before adding 2 more tablespoons butter. 

Sauté for another 2 minutes, then add ½ teaspoon salt and ¼ teaspoon nutmeg. Allow the leeks to melt for another 5 minutes before adding 1 tablespoon heavy cream. Remove from heat.

This serves 4. Voilà. This is a wonderful side dish for meats, poultry or fish. This is also a beautiful compliment to Salmon with Garam Masala Baked in Parchment

Read more...

Chicken Bake for Children

A friend of mine had injured her finger some weeks ago and wasn’t able to prepare any food for her family without suffering pain, so a group of friends offered to help her out for a few days. With the kids at school, she had a chance to relax a bit, but needed help with dinner, so I offered to help her out for two meals.

With no kids of my own, I was truly unsure what to make. I have heard that children have quite a few dislikes and can be quite finicky at times, so I really wanted to prepare something that the whole family would enjoy. From past experience, with other friends that have kids, macaroni and cheese or chicken nuggets always seem to be a hit, so a chicken bake should do the trick.
Photography by Heaven on Hearth

Not wanting to the kids to be turned off by too many spices, but also having the parents enjoy a nice meal, I came up with my plan: chicken thighs, pasta, creamy sauce and cheese. Children must love it! So I rolled up my sleeves and got to work.


I used a six cheese Italian blend that has Mozzarella, Provolone, Parmesan, Asiago, Fontina and Romano Cheeses. It wasn’t too harsh in flavor that the kids wouldn’t enjoy it.
You will need:
6 cups of elbow pasta cooked
4 boneless chicken thighs (about 22 ounces) sliced in thin strips
½ of a medium sweet onion, finely diced
1 clove garlic, finely chopped
4 ounces mushrooms chopped (Cremini and White button)
1 teaspoon salt
½ cup cheese Six Cheese Italian Blend)
¼ teaspoon black pepper
2 tablespoons olive oil
5 tablespoons butter
4 tablespoons flour
8 ounces heavy cream
1½ cups chicken broth
1 handful of parsley finely chopped
1/3 cup of cheese for the topping
Begin with cooking the pasta as the directions suggest, as you will be requiring 6 cups of cooked pasta. By the time the pasta is cooked, the chicken and cream sauce will be ready. It’s so much easier when all ingredients are nice and hot so the baking time at the end will not be too long.
Prepare your ingredients before hand. So start by slicing 4 boneless chicken thighs into thin strips, then, finely dice ½ of a medium sweet onion. Finely chop 1 clove of garlic and roughly chop a mix of 4 ounces Cremini and white button mushrooms.
Chicken Strips, Onions, Garlic and Mushrooms
Heat a large skillet at medium high heat. Once the skillet is nice and hot, add 2 tablespoons olive oil and toss in the chicken strips evenly in the skillet. Let it brown for 3 minutes on one side, then toss again after 2 minutes. Add the finely diced onions and the chopped garlic and let soften for 3 minutes, tossing occasionally. Toss the chopped mushrooms in the skillet, then season the chicken mixture with 1 teaspoon salt and ¼ teaspoon black pepper and toss occasionally for another 3 minutes before transferring the mixture into a bowl.
Creamy Sauce
Using the same skillet, over medium high heat, melt 5 tablespoons butter. Once the butter is melted and slightly bubbling, add 4 tablespoons flour and using a whisk, stir the butter and flour mixture so that it doesn’t burn for 1½ minutes. Turn the burner down to medium low, then add 8 ounces heavy cream and 1½ cups chicken broth and simmer on medium low heat till bubbling for about 4 minutes. Add chicken mixture and pasta to the cream sauce and toss well, ensuring that the pasta is well incorporated in the sauce. Turn the heat off.
Chicken and Pasta Mixture with Parsley
 Take a handful of parsley and finely chop. Add to the chicken and pasta mixture as well as ½ cup six cheese Italian blend. Toss the mixture well, again.
Chicken and Pasta Mixture with six cheese Italian Blend
I used 4 individual ramekins. Fill each with 2 cups of the mixture. Or if you wish, you can use two large ramekins and 4 smaller ones if you have little children. Top the ramekins evenly with 1/3 cup of six cheese Italian blend.
Ramekin filled with Creamy Cheesy Chicken Pasta
Since the mixture is still hot, turn the oven on to broil, on high. Place the ramekins on the top rack and broil until the cheese is golden brown. This will vary with each oven, but it shouldn’t take more than 2 minutes if as much.
Ready to be Enjoyed!
This serves 4. Voilà. The whole family enjoyed this and I was told that the kids didn’t even mind the parsley, so I was quite happy.

Read more...

Roasted Pumpkin with Yogurt and Black Sage Honey Sauce

During my visit to a Latin supermarket, trying to find an ingredient for one of my Jamaican dishes, I came across a beautiful piece of pumpkin that had such a vibrant orange color, that I just couldn’t resist getting. I just knew it would have been perfect for a dish I had in mind. Roasting pumpkin brings out the sweet flavors and the soft silkiness of the vegetable. Adding some smoky spices to the pumpkin gives it that warm, comforting taste and fragrant smell that I was looking for.
Photography by Robert Demetrius

Black sage honey has a buttery caramel flavor that I thought would go wonderfully well with the roasted pumpkin sprinkled with smoky spices. So, I decided to serve the roasted pumpkin with thick and creamy Greek yogurt blended with the buttery caramel flavor of the black sage honey to just top it off.

2 pounds pumpkin
2 tablespoons olive oil
1 large garlic clove, minced
1 teaspoon cumin
½ teaspoon coriander
½ teaspoon nutmeg
½ teaspoon salt
Yogurt and Black Sage Honey Sauce

Start by pre-heating the oven to 450°Fahrenheit.

Line a baking sheet with parchment paper.

Wash the pumpkin well, then pat dry before slicing it into ½ inch thin slices.

In a small dish, blend 1 teaspoon cumin, ½ teaspoon coriander, ½ teaspoon nutmeg and ½ teaspoon salt together.
Pumpkin Slices with Spices and Garlic
Place pumpkin slices on the parchment paper lined sheet before drizzling with 1 tablespoon of olive oil, then sprinkle with ½ of the spice blend. Turn the pumpkin slices over and repeat the process by drizzling with 1 tablespoon olive oil, then sprinkle with the spice blend.

Mince 1 large clove of garlic and sprinkle over the pumpkin slices.

Once the oven has come to 450°Fahrenheit, place the baking sheet in the oven for 20 minutes, before turning the pumpkin slices and baking them on the other side for a further 5 minutes.
Pumpkin Slices Hot from the Oven
Prepare the Yogurt and Black Sage Honey Sauce by mixing the yogurt and honey together.
Pumpkin Slices Ready to be Served
Let the pumpkin slices remain on the sheet for about a minute before transferring to a platter. Serve a dollop of my Yogurt and Black Sage Honey Sauce with the roasted pumpkin.

This serves 4. Voilà. If you are like me, I couldn’t wait to eat it so I dipped the roasted pumpkin into the yogurt. Enjoy!

Read more...
Protected by Copyscape Online Infringement Detector
MyFreeCopyright.com Registered & Protected

  © Blogger template Shush by Ourblogtemplates.com 2009

Back to TOP