Related Posts Plugin for WordPress, Blogger...
Showing posts with label eggs. Show all posts

Quiche Lorraine

This is such a wonderful way to start off the perfect weekend breakfast. A flaky crust filled with a creamy, cheesy custard filling with bacon bits, a glass of orange juice and fresh fruit on the side with a steaming cup of coffee. What a delicious way to start your morning.
Photography by Robert Demetrius

You will need:
Pâte Brisée or one store bought ready-to-bake rolled pie crust
4 slices thick cut smoked bacon, cut in ¼ inch slices (8 ounces)
⅛ teaspoon nutmeg
¼ teaspoon salt
⅛ teaspoon pepper
1 cup grated Gruyère
2 eggs + 2 yolks
1 cup whole milk
½ cup heavy cream

If using the Pâte Brisée recipe, just use half the ingredients, as you will only need one crust.  Once you have made the dough and it has been in the fridge for an hour, remove and allow to rest at room temperature for about 5 – 10 minutes. This will allow the dough to soften a bit and it will be easier to roll.
Dough Ready to be Rolled
Pre-heat the oven to 400° Fahrenheit. While the oven is warming up, unwrap the dough and place on a lightly floured surface and also dust the top of the dough with flour. 
Rolling Out Dough
Roll out the dough, starting from the center to a 12inch circle. The dough should be around ⅛ inch thick.
Rolled Dough Ready to be Placed in the Dish
Gently Rolling Pastry on Rolling Pin
Lightly butter a 9inch pie dish, then gently roll the pastry on the rolling pin before unrolling over the baking dish. Press the dough gently into the dish as well as around the edges. 
Pressing Dough onto Dish
Cut the excess dough from the edges. Make sure the edge of the dish is well covered with dough, because it may shrink a bit during baking. If you have any tears in the pastry, use some of the excess dough to patch them together.
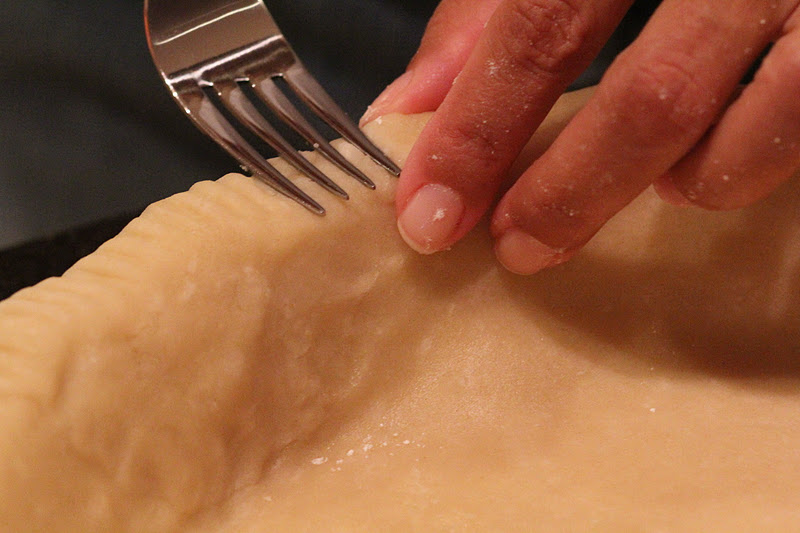
Flattening Pastry with Fork
Using a fork, lightly prick a few holes in pastry. This will prevent the crust from rising and bubbling up when baking. This has happened to me in the past, even though I used weights while baking. Then, using the tines of the same fork, flatten the pastry evenly on the rim of the dish.
Pastry Flatten on the Rim
Cover the pastry with aluminum foil and weight with beans, rice or with weights. I usually use rice. 
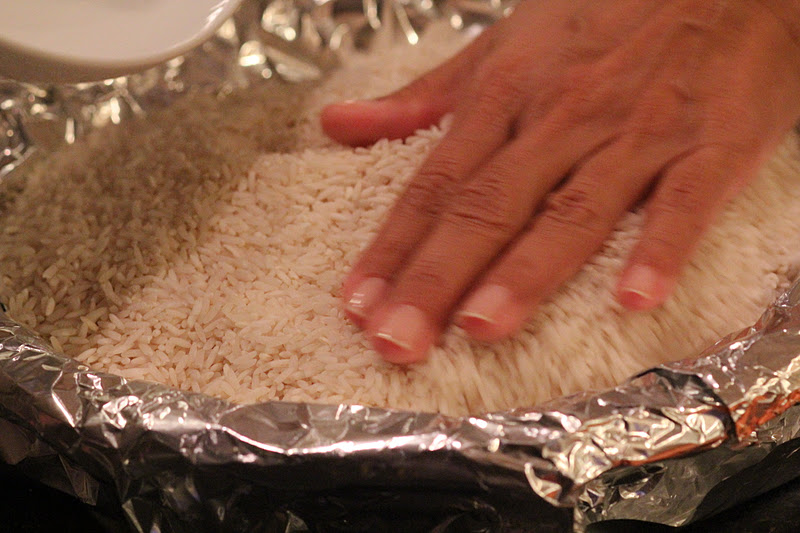
Covering Pastry with Aluminum Foil, Weighted with Rice
Bake the crust for 18 minutes. Once baked, remove the weights and aluminum foil in one swoop, by just lifting the aluminum foil, by the edges with the weights. Place the dish back in the oven to allow the crust to dry out a bit and get golden brown for another 10 minutes. Remove from the oven and allow to cool on a cooling rack.
Baked Crust
Once the crust has cooled, heat a skillet over medium high heat. 
Bacon cut in 1/4 inch slices
Cut 4 slices thick cut smoked bacon in ¼ inch slices. Toss the bacon slices in the heated skillet and allow the fat to render and the bacon gets crispy. This can take 4 – 5 minutes. When crispy, remove from skillet and place on paper towel lined plate to absorb any excess fat.
Bacon Bits 
Pre-heat the oven to 350° Fahrenheit.
Grated Gruyere
Grate 1 cup Gruyère.

Eggs, Egg Yolk, Salt, Pepper, Nutmeg, Whole Milk and Heavy Cream
In a large bowl, whisk together 2 whole eggs and 2 yolks, ⅛ teaspoon nutmeg, ¼ teaspoon salt, ⅛ teaspoon pepper, 1 cup whole milk and ½ cup heavy cream.
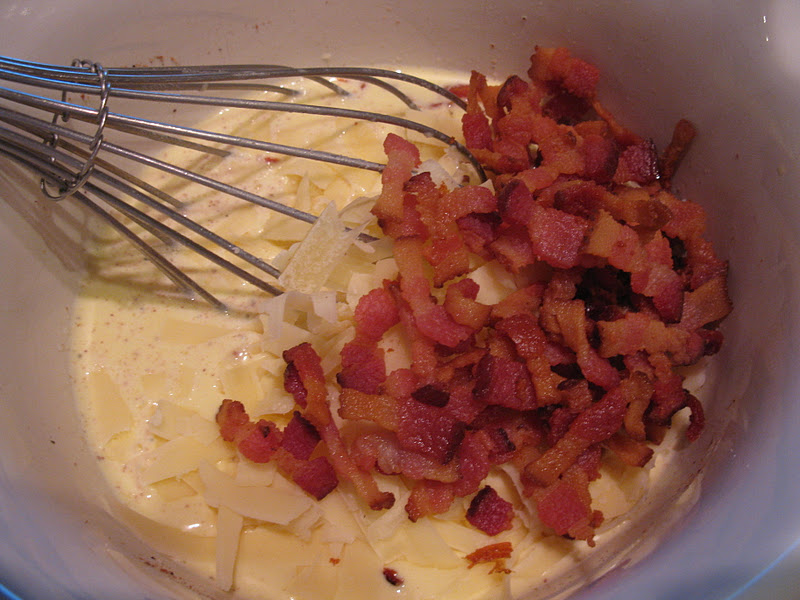
Adding to Egg Mixture, Cheese and Bacon Bits
I then add the cheese and the bacon bits and mix together before pouring into the cooled crust.
Covering Edges with Aluminum Foil
Cover the edges of the crust with aluminum foil. Bake the quiche for about 25 minutes before removing the foil from the edges and bake for 5 more minutes before taking the quiche out of the oven.

To test the quiche, stick a knife or a bamboo stick in the middle and if it comes out dry, then it’s done. If it still jiggles a little bit, don’t worry. It will set by the time it is cooled. Let cool and serve at room temperature.

A Slice of Quiche Lorraine with Baby Greens Tossed with Vinaigrette
This serves 6. Voilà. A slice of quiche with baby greens tossed with vinaigrette and a glass of sauvignon blanc can also be served as light lunch or supper.  Enjoy!

Read more...

Egg Salad Sandwich

Egg salad sandwich is a great comfort food. The creaminess of the egg mixed with the tangy and slightly spiciness of the dressing, on top of the slightly strong flavor of the rye bread. Perfection.
Photography by Heaven on Hearth


You will need the following:

¼ cup of mayonnaise
½ teaspoon Dijon mustard
2½ teaspoons of lemon juice
1 teaspoon grated onion
2 tablespoons finely sliced scallions
½ teaspoon salt
1/8 teaspoon black pepper
1/8 teaspoon sweet Hungarian paprika
butter or mayonnaise for spreading on the bread (optional)
8 slices dark rye bread

Use an egg slicer to chop the eggs. It’s quite easy. Place the egg in the egg slicer and once sliced, pick the whole egg up and turn the other way around to slice. You will get some nice chunky slices.

In bowl, mix ¼ cup of mayonnaise, ½ teaspoon Dijon mustard, 2½teaspoons of lemon juice, 1 teaspoon grated onion, 2 tablespoons finely sliced scallions, ½ teaspoon salt, 1/8 teaspoon black pepper and 1/8 teaspoon sweet Hungarian paprika. Once well mixed, add the chopped eggs. Combine well. I like to cover the salad for about 30 minutes and let it rest in the fridge before spreading on bread slices, the flavor gets a chance to be absorbed throughout.

Spread a fine layer of butter or mayonnaise on the bread slices and evenly spread the egg salad on top of 4 slices and cover with the remaining 4 slices.

If you wish, you could also toast the bread slices before making the sandwiches.

Egg Salad Sandwich
There you have it. This serves for 4. Voilà. What a perfect summer sandwich.

Read more...

Perfect Hardboiled Eggs

As a lover of eggs, I usually find any excuse to eat them and some dishes just call for having perfectly hard boiled eggs. The egg white is pristine in color and the yolk, perfectly yellow without a darker greenish lining surrounding the yolk. This method is perfect when boiling a larger quantity of eggs.
Photography by Heaven on Hearth


It is best to use eggs that are about 3 – 5 days old as they are much easier to peel. Also, having the eggs at room temperature will make the cooking time shorter and there will be less chance for the eggs to crack.
Eggs in One Layer in the Pot
In a large pot, place 6 eggs and cover with cold water. Make sure that the eggs are covered with about an inch of water and that they are nice and neat in one layer so that they cook evenly. Bring the water to a boil over a medium heat. Once brought to a boil remove from the heat and leave covered for a further 15 minutes. After 15 minutes, either drain the water and fill the pot with cold water and repeat two more times or place the eggs in ice water. This will allow the eggs to peel easily.

Use hard boiled eggs for salads, sandwiches and deviled eggs.
This makes 6 hard boiled eggs. Voilà. How easy was that.

Read more...

Baked Eggs, Sunday Style Just for One

Why not treat yourself to a Sunday morning breakfast during the week? Go for it, you are worth it.
This breakfast dish makes you feel all warm and fuzzy inside with the very first bite. It has so many heartwarming elements. You get the creaminess from the egg, the buttery taste of the cream, the smoked hickory, sugar cured bacon gives it a smoky sweet flavor, the mushrooms lend an earthy yet meaty flavor and texture, the slowly caramelized onions offer a sweetness and then the lemony thyme bits, the mild yet fresh onion flavor of the scallions and the garlicky flavor of the chives, all in one bite.

Photography by Heaven on Hearth
Here are all the ingredients you will need:
2 eggs
2 oz. bacon, or 1 rasher, sliced in ¼ inch thick slices
2 oz. onions, about ¼ medium size onion, sliced then cut in half
2 oz. mushrooms (1 oz. cremini mushrooms, 1 oz. white mushrooms) finely sliced. You can use all white mushrooms if you prefer or just use what you have on hand. Please don’t use canned or bottled mushrooms because the dish will get very watery and will also have a rubbery texture, which you really don’t want.
½ ounce scallion (1 tablespoon and 1 teaspoon) chopped
½ teaspoon fresh thyme
1 tablespoon and ½ teaspoon chives
1 ½ tablespoons on heavy cream
pinch of pepper

Preparing all the ingredients beforehand makes it so much easier to put together but don’t sweat it if you don’t, it’s actually quite easy and can be done pretty quickly in between the stages.


Photography by Heaven on Hearth

Use a non-stick skillet for this. Just turn the burner to a medium low heat. This will also depend on your burner of course, but lower is better for this dish. Heat the skillet until the bottom of the pan is toasty warm. You can check it by just placing your palm about 1 ½ inches above the bottom of the skillet. Just don’t touch it…or else! Once you feel that warmth on your palm, you know the pan is heating and it’s time for you to throw in the bacon. Keep your spatula at hand since you will want to move it around in the skillet every now and then. Sauté the bacon for about 2 minutes, not much longer. You will notice that the bacon is not getting crispy, but don’t worry, we really don’t want it to start getting crispy at this point.

Bacon, Onion and Mushroom Mixture
While the bacon is gently sizzling away, slice the onions in the mean time. Add the onions and sauté with the bacon for another 3 minutes. The bacon is now getting a nice color, the fat is melting nicely and the onions are becoming translucent.
Start slicing the mushrooms, while the bacon and onions are being sautéed. If you have already bought sliced mushrooms, just run your knife through them again so that they are a bit finer and smaller in size. If using whole mushrooms, cut in half then slice finely.
Now, add the mushrooms and mix evenly through the skillet for a further 3 ½ - 4 minutes. Once that is done, you will realize that the bacon is nice and crispy, the onions have started to caramelize and the mushrooms have absorbed all the yummy oils and flavor of the bacon and onions. Do not add any salt. The bacon is already a bit salty, but if you add salt to the mushrooms, it will bring out the water and we are not looking for a saucy consistency with this dish. It is however okay to add some pepper if you wish. Sometimes, if I am feeling fiery, I will add a pinch of dried pepper flakes to give it a nice kick. Chop the herbs and set aside until needed. So, now with this mixture done, I turn the oven on to low broil while putting the final dish together, so that the oven is nicely heated before putting in the ramekin. Make sure that the tray is about 5 inches below the heat of the broiler.

Just before going into the oven
Put the mixture in an 8 ounce ramekin. There will be no need to butter the ramekin, because there is enough fat in the mixture, so it wont stick on the dish when finished. Make sure all sides are covered with the mixture, sort of cupping on to the ramekin.
Crack two eggs in bowl, just to make sure that they are good, then gently pour into the ramekin. If a yolk breaks, no need to worry, it will still be good. Sprinkle the herbs on top of the eggs and then finally add the cream. Put the ramekin on top of a baking dish, just so that it doesn’t tip over in the oven, in between the spaces of the rack. That could get pretty messy. Once placed in the oven, broil on low for about 6 – 7 minutes. You should get a nice firm egg white and soft yolks underneath. Season with salt and pepper if you wish.
Baked Eggs, Sunday Style Just for One
Voilà! If you are going to have this dish first thing in the morning, serve with toast, but if you are making it more around lunchtime, add a tossed green salad and some Italian bread and butter. Enjoy.

Read more...
Protected by Copyscape Online Infringement Detector
MyFreeCopyright.com Registered & Protected

  © Blogger template Shush by Ourblogtemplates.com 2009

Back to TOP